
Two weeks ago The Shipment came. In three long, heavy boxes: loom extension; shaft draw system to upgrade from the old one; combination single unit set-up. It was like Christmas in June. I think my husband was just as excited as I was. Let the fun begin!
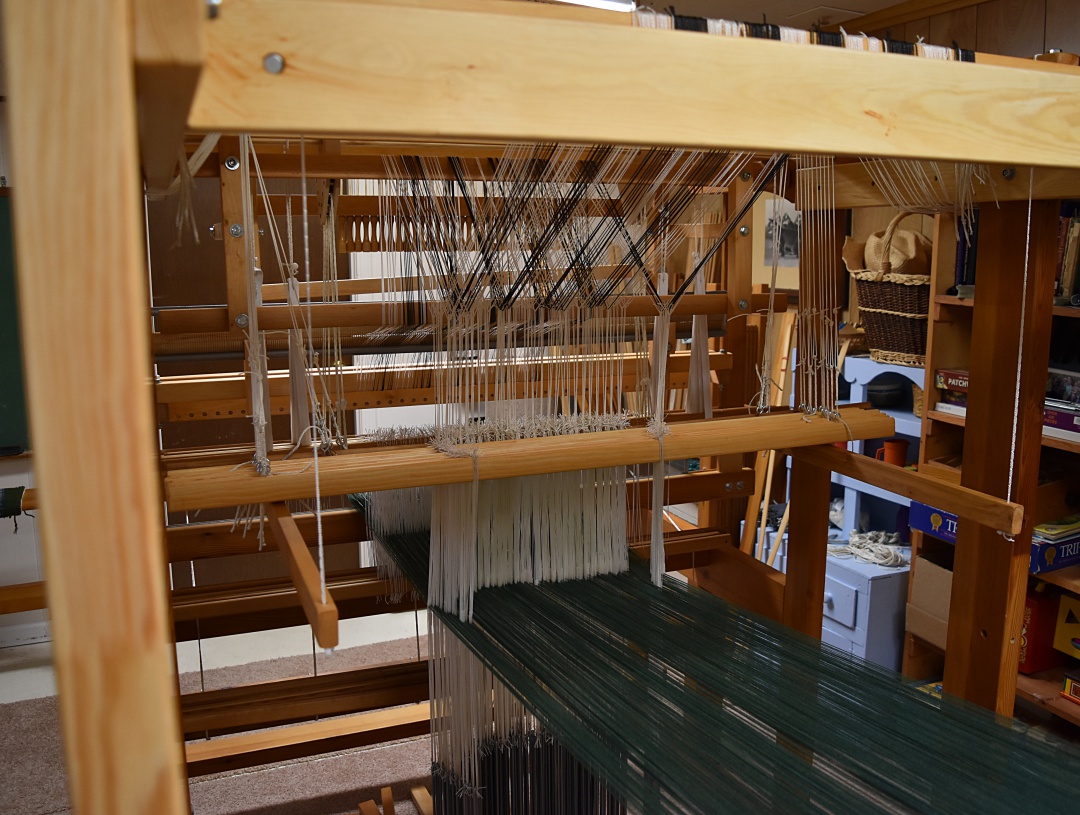
The view from the back
The pieces of the extension were finished but the other wooden pieces needed to be oiled and finished before I could put them together. And I’m a bit slow to comprehend things, so I read and reread the sheets that came in the boxes. One box only had a parts list—I was on my own to figure out how to assemble it. Another had more instructions, but no identification of the parts, so I had to figure out what some of the pieces were. The third box not only had instructions, but they were numbered to correspond to a drawing and little baggies of bolts and nuts. Hurray! I also had an idea from the Vävstuga video, Dress Your Swedish Drawloom, about how to proceed.
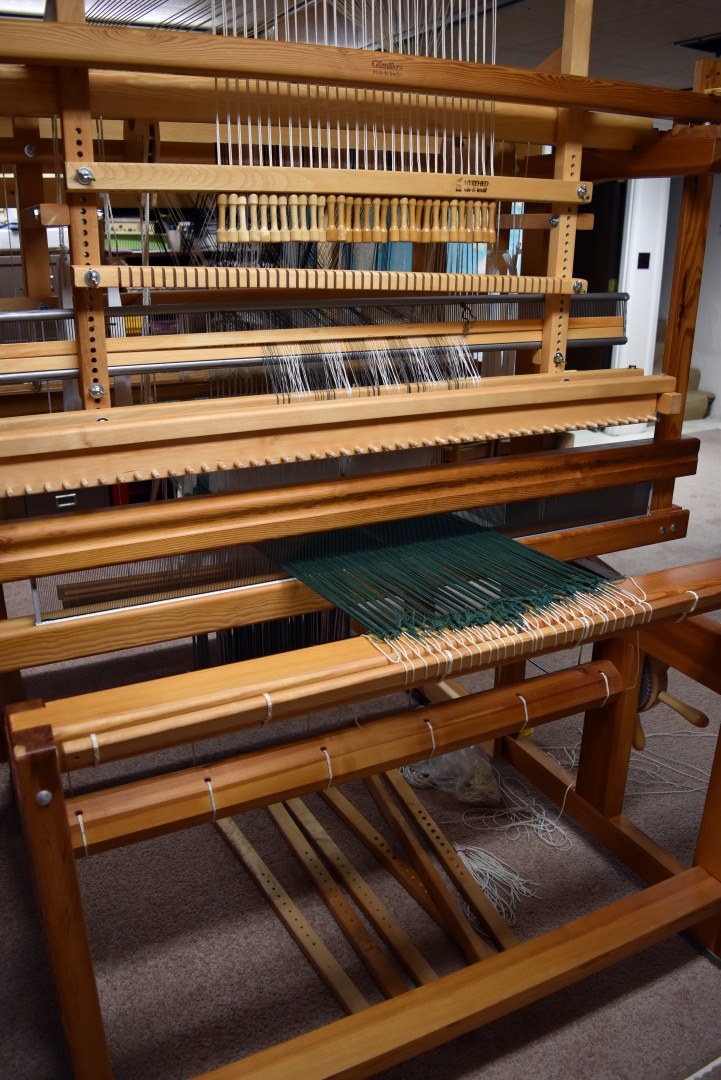
Hanging the treadles
Piece by piece, it started to come together. By the end of last week, I had most of the attachments assembled and installed. Some had to wait till I had a warp on the loom.
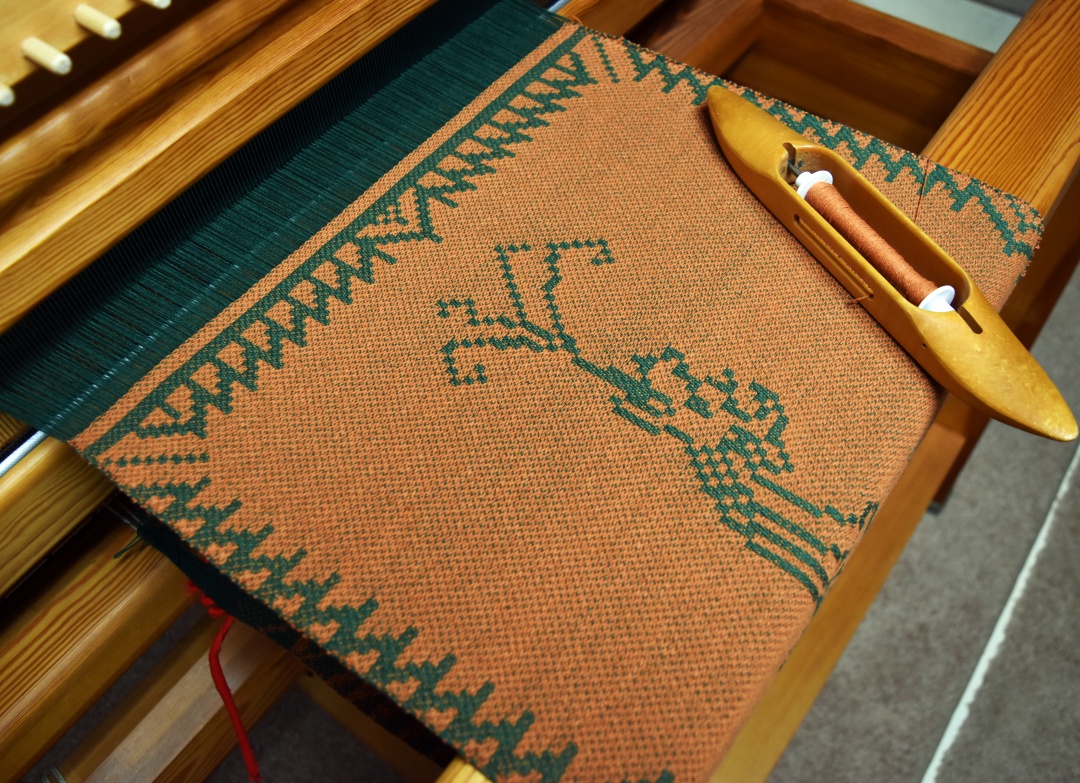
As I was learning more about drawlooms this spring, my husband joked that he wanted some dragon placemats. That seemed like a good project to start with.
I found a fun graphed dragon in Here Be Wyverns by Nancy Spies (©2002 Arelate Studio, Jarrettsville, Maryland) and adapted a border from 826 Textila Bärder by Britta Johanson (©2009 Korssstygnsbolaget) Designing the border posed its own challenges. It took some work to balance the design to fit an 18” placemat.
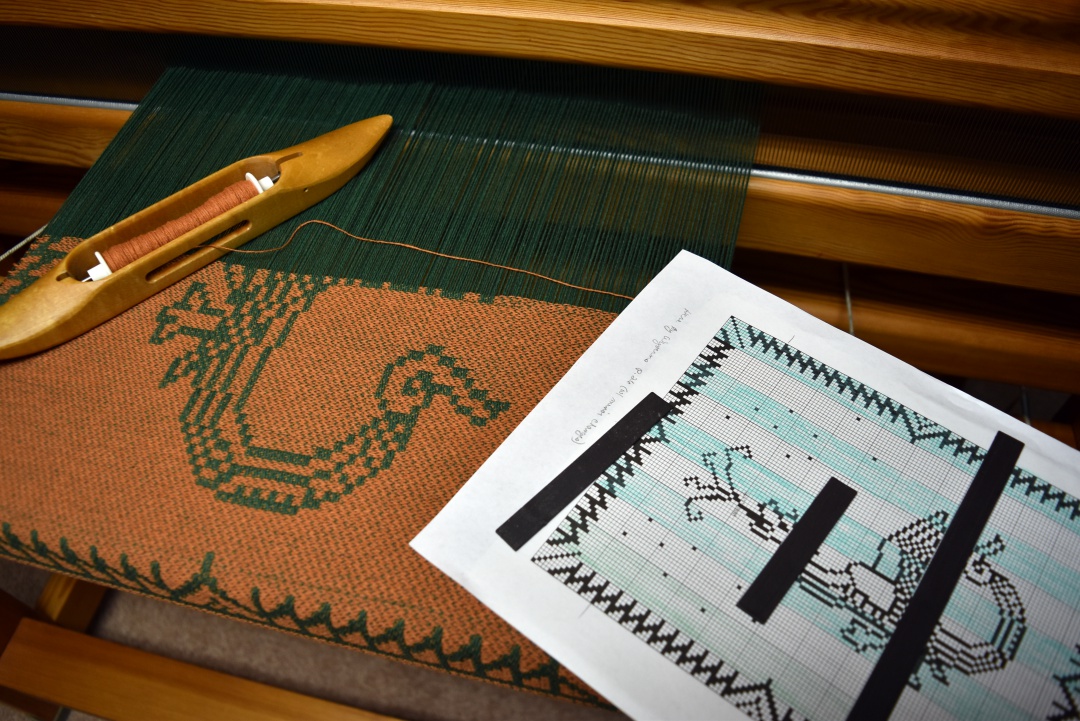
The dragon taking shape
I chose to weave a 6-thread irregular satin with an 8/2 cotton warp. This allows me to be able to see what I’m doing and make any adjustments more easily.
Because my existing countermarche is too long to fit within the new drawloom frame, I set this warp up on a counter-balance beam. This, too, is a first. With the 6-shaft satin on this counter-balance tie-up, shaft 1 is tied to shaft 6, 2 to 5, and 3 to 4. So when I pull up shaft 1, shaft 6 goes down; the same with all the others.
I tested the shed by weaving a couple inches and measured a few random units to get a feel for how well the graphed design would fit in my planned weaving length. All set, the mat began, first with the hem, then the border, and on to the tail.
The view from underneath
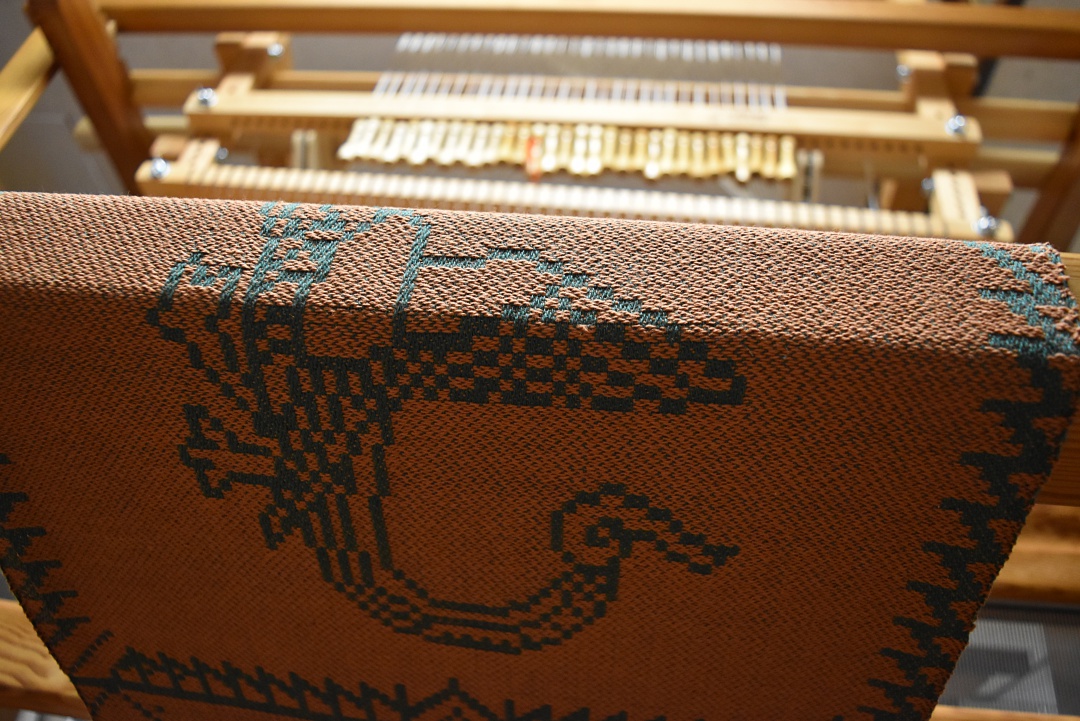
The wings took shape, followed by the head complete with “flames”. Finally the border and ending hems. The mat ended up a bit longer than I intended, but the cotton will shrink in the finishing.
First mat finished
This has been a satisfying first project. Now I have to decide what project to follow.

Congratulations on a successful first project! It looks wonderful!
Thanks–and so does your opphamta! The pillowcases will be lovely!
Awesome!! Looks beautiful!!
Thanks, Karen. Has your attachment arrived yet?
Not yet. I haven’t heard ETA yet. They have to custom fit mine because my loom size has been discontinued. I so appreciate Bettie for arranging this for me. I am working on setting up a small single draw project while I wait so I don’t forget all I learned! I love your blog! Thanks for keeping us up to date!
Oh, the places you’ll go! You’ve just opened a whole bunch of new doors for yourself!
Jean, the dragon is wonderful. Love the flames! Enjoy your new set up – I am very envious! 😉
Thanks, Martha! I want to work on those flames, make them more, well, shapely. We’ll see what comes of it.
Wow! I bet your having fun with your new toy. Your first project shows the possibilities your able to explore. Congratulations!
Thanks! The ideas are starting to form….
Pingback: Counterbalance to Countermarche | jeanweaves