Counterbalance to Countermarche

Tags

,

It’s been a little over three years since The Shipment came – the boxes that held my new Myrehed Combination Shaft and Single Unit Drawloom and loom extension. Three years since I inaugurated the set-up with dragon placemats, followed by seasons wall hangings, barns, and most recently orchid bookmarks.

All this time, the ground shafts operated as a counterbalance set-up because the existing countermarche did not fit within the drawloom frame. I was okay with counterbalance, but I really missed the stability and flexibility of countermarche weaving. I dreamed of adapting the countermarche to fit the drawloom.

This week it finally happened.

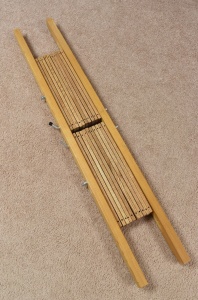
Original countermarche and jacks

Original countermarche and jacks

I knew I wasn’t going to get this done without some help and I have to give a lot of credit to my Dear Husband. He knows I am a “hasty bear” with woodworking projects and I don’t always see how things could possibly be “that difficult”. He thinks ahead and sees challenges in my enthusiastic plans. He is more methodical – measure twice, cut once.

So he suggested, then stated, then insisted, that we make new jacks the shorter length rather than just cut the existing jacks shorter. He didn’t want to ruin pieces that couldn’t be replaced. I thought we could do it, but accepted his advice. Good thing.

He also said it would be next to impossible to drill the upright holes straight without a drill press. We weren’t going to buy a drill press for just one project, but we did find an affordable drill guide. Then off to the lumber store for ½” x 1 ½” wood. Home again, we measured, cut, — and lo and behold, I mismeasured one of them. Back to the lumber store for one more piece.(Mis)measured wood

Next came the drilling. We had to drill a new pivot bolt hole in the countermarche frame to center the shorter jacks. Each jack needed a pivot hole in the center, two holes on either upright end for the cords, and a locking pin hole. I wanted to use the existing locking pin holes in the frame to avoid drilling into the frame more than needed.

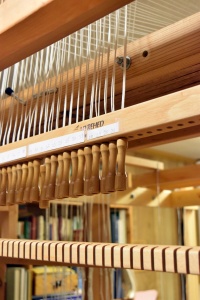
New jacks in place

New jacks in place

This is where I so appreciated my husband’s insistence on making new jacks. We measured, measured again, positioned, lined up, held breath, and started drilling. I won’t show the holes; some are not very pretty. Even with the drill guide, drilling straight, centered holes on the upright edge of a ½” board is not easy! And as carefully as we measured, when all the new jacks were bolted into place, the locking pin holes did not line up close enough to get the pin through. After some rearranging and filing, the locking pins are in place.

As I was lining up holes and bolts, I hoped that the shortened jacks would indeed fit between the draw bridge frame once we got it all put together. And yes, they do fit–and move freely.Countermarche mounted

Now, thanks to my Dear Husband, the countermarche sits atop the loom, under the draw bridge, awaiting new warps. My mind is working.

Ready to weave

Samples

Tags

, ,

Nearing the warp's endNear the end of a project, with the final throws of the shuttle, while I’m quietly stitching the hem, there’s a hint for the next warp. It teases its way into my brain. It’s the “what if…” that carries weavers to rethread the loom time and again.

What if I change the treadling from a straight sequence to a pointed sequence? What happens if I use a finer yarn? What if I focus on block A instead of block C? What if I weave overshot as if it were honeycomb? Can it even work? The only way to find out is to try it.

Samples. I have to confess I’m a “let’s just get it done” type of person. I’m thrifty and I’m impatient. Samples have always seemed like a waste of time and money, and what would I do with them afterwards?

I’m getting wiser in my old age. How many times have I woven something only to find out the sett was too tight, or the yarn I’d chosen bleeds, or the weave just wasn’t what I thought it would be. That’s a waste of time of money.

So my sample stash is growing. I had a tub …

Tub of Samples

that spilled over to a drawer …

Drawer of samples

and now to a second drawer.

Overflow drawer of samples

I really admire those super-organized weavers who keep their samples in neat binders and sleeves along with all their planning notes and records. I’m not there yet.

I have at least started tagging my samples so I have a vague idea about what I was trying to do and why it did or did not work. That’s a start.

The next step is to sort them into some order so I can find that inspiration when I need it. And as I’m sorting the samples, one or another gives me pause. A different yarn perhaps? Maybe this will work for that new curtain? What if I added an accent color right there? What if….?

Left, Right, Left, Right

Tags

,

My left hand doesn’t know what my right hand is doing. Seriously. My right hand can do things my left hand can’t even pretend to do. I know this is common, but my directional challenges became very clear during my on-going exploration of unfamiliar weaving skills.

Some techniques are very directional. To make a ridge slant right or left, the yarn has to follow the right path. How I pull it around a warp thread can change the slant of the knot.

Soumak is one of those methods. Soumak is a decorative, hand-manipulated technique often used in rugs but I’ve heard of it used in wall hangings and other textiles as well. It goes way back in textile history and shows up with many forms.

There are two wefts in soumak: the soumak weft and the ground weft. The soumak weft wraps and crosses the warp but is mostly decorative, thus the need for a ground weft for stability. Peter Collingwood presents several variations of soumak in his book The Techniques of Rug Weaving.

I wanted to try my hand at double soumak which makes a nice, thick ridge and, if worked in more than one row, will form horizontal v’s.

Going right to left went smoothly: forward over two warps, back under the 2nd one and then over the 1st one and snug it down, a figure-8. The row progressed well. Right up to the turn at the left edge, where I had to move the yarn up and start working left to right.

For the life of me, I could not flip the technique to move left to right. My wraps kept going in the wrong direction, which was apparent when the v’s didn’t form. Time to walk away from the loom, and think about what my hands were doing.

Forward over two warps, back under the 2nd one, then up over and around the 1st one, crossing the 2nd one, a left-handed figure-8. Repeat. Take mistake out, try again. Repeat. It only works if the hand follows what the mind is telling it to do.

It’s taking some practice and concentration, but the left hand is starting to catch on.

Trying Something Different

Tags

,

Somewhere, at a dinner table, a parent cajoles a reluctant child—

“Come on, just try it. You might even like it.”

Could be peas. Could be curry. Could be papaya. I resisted winter squash when I was young, but at some point, Mom won and – what do you know? I do like it!

Rug-weaving is like that too. I wove a few rag rugs because I had rags and I had a loom. I didn’t spend much time thinking about color schemes and I didn’t weave more than what we needed around the house. I never learned any other rug technique either, like looped pile, knotted pile, soumak, or the like because those just didn’t interest me. That is, until this summer.

Our guild had duplicate copies of many books and offered the extras for sale to members. I picked up a copy of Peter Collingwood’s The Techniques of Rug Weaving. Wow, what a packed volume! After paging through several chapters of step-by-step instructions and diagrams, I just had to give it a try. I threaded up the loom for some play time.

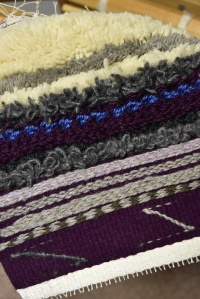
After putting on a good strong warp, I experimented with knots, loops, edges, and chains. A few rows here, a few there, just enough to give me a little idea of what the surface looks like. Then on to a more focused sample.

First up, Ghiordes knots. Collingwood says these are the most common knots and are fairly secure in the warp after a few shots of plain weave binds them in. This is the brown section on my sample. I wanted those knots to be really secure and after one row, I thought they looked a little skimpy so I made sure to pack them in.

Next, I tried Sehna knots in green wool. After realigning my fingers a bit, I think I got the hang of it, sort of like wrapping a figure-8 around two warp ends. I was aiming at a good thick pile and was not disappointed. The knots snuggle right up to each other so much that I had a hard time getting my temple to bite the edges.

Finally, I did some single warp wraps or Spanish knots in gray. The yarn just wraps around a warp thread a couple of times, over-under-over, to end up on the surface. These knots are the least secure but with four shots of plain weave ground before and after a row of knots, they stay put. I finished a couple inches and decided it was time to cut off the samples to see the results.

Sure enough, the pile is thick and cozy, but all those knots in close proximity to each other curl the piece towards the back. Another thing I noticed was the width. At the beginning of the sample, the temple wasn’t set wide enough and the brown part is ½” narrower than the gray.  And of course, I didn’t have quite enough warp to do a proper edging at one end.

I’m enjoying my little adventure into new weaving territory. This is quite the change of pace from the dish towel cottons and fine damasks I’ve been weaving recently. I’ll get back to those soon enough, but not before another knotted pile sample.

Then those looped piles are intriguing.

Natural Inspiration

Tags

,

I have a habit of taking pictures of unusual things.

Colorful lichen formations

There’s something fascinating in the shapes and color combinations that occur naturally, about the variety of small fungi and mosses that grow on rocks and trees, about the way a tree heals from an injury.

Humans have been awed by nature since the beginning of time. In one way or another, we try to express our fascination, our fear, our wonder of the world around us in whatever medium is at hand.


It’s instinctive—nature inspires. Nature is awesome, and when we are awed, we reach for what is close at hand to capture and communicate that awe.

The respected weaving teacher Sharon Alderman told how she walked around her block, taking dozens of pictures for color inspiration. Colors that occur naturally together are good starting points for a weaving project.

A couple years ago, we visited southwestern Wyoming and Utah. The shapes and layers in the rock formations amazed me. Can you visualize the advancing twill lines in those hills?


That’s why I take pictures in my backyard. I take pictures in parks. And like all of us, I take pictures on vacation. Someday, those pictures will become weavings, in one way or another.

Color Perception

Tags

,

Most of us have a favorite color. Mine is green. Or maybe blue. Some will say fire engine red or tangerine orange. I know some little girls who have to have everything purple.

Funny thing is, what I call purple may not match what they think of as purple. Purple to one person may look like red-violet to another.

Woods in the spring

My favorite green comes from a northern woods in early summer, before the heat dusts all the leaves. An intense green with blue and yellow overtones. Can you see it? Just picture a woody stream with the sunlight streaming through the branches.

For every hue, there are shades, tints, tones, and temperatures depending on how much black, white, gray, red or blue is mixed in. A color can be warm (more red) or cool (more blue). And for every shade, tint, and tone, there are some really great names for them.

Sierra (deep brown). Yale (dusty blue). Sapphire (which actually looks more green than blue to me). Grotto (light lavender). Summer Glade (soft light green). Light red. Dark red. In one yarn company’s line, the light red is darker than the dark red. Go figure.

Yarn isn’t the only medium where colors boggle the mind. Just stand in front of the paint chips at the hardware store – the color choices are overwhelming. Many paint displays allow you to change the lighting so you can better match what’s in your home. What looks light blue in incandescent light may look white in fluorescent light.

Purple and blue yarn on white backgroundHow we see a color is affected by its surroundings. Put purple yarn on a light background, then on a dark background. Same yarn, different perspective.

A gray circle on a white background will look darker than that same gray circle place on a black background. A room with windows facing west or south will get more yellow light than a north-facing room. Put a shady tree outside those windows and the color changes.

Practically speaking, one of the first decisions I make when planning a weaving project is the color. If I want to make something green, but don’t have enough of the right green, how can I blend what’s on my shelf to make what’s in my head? Sometimes adding an accent of a complementary color will intensify the main color. Too much of that complementary though will just gray it out.

Color is very personal. Everyone has one or two favorites, colors they gravitate toward and feel comfortable with. Mine is green. What is your favorite color?

Look It Up!

Tags

,

“I don’t think that means what you think that means.”

Like Inigo Montoya, (“The Princess Bride”) I’ve found myself muttering that phrase lately. And it reminds me of my Mother’s answer whenever we asked what something meant—look it up!

We use a lot of words that are specific to our interests, but do they really mean what we think they mean?  If we have to explain a term, can we do it without Google?

I’ve come across some design terms lately that I thought I knew – until I tried to define them. For example, what is the Golden Proportion?

What I learned when I looked it up (Mom would be so proud!) is that if you divide a line unequally into two sections, the ratio of the smaller section to the larger section should be the same as the ratio of the larger section to the whole. That’s the Golden Proportion (or Golden Section, or Golden Ratio). The same with a rectangle and any other shape or space. Our brains like the balance of that proportion.

Then there are design elements — line, shape, pattern, texture, color – and design principles — focal point, contrast, repetition, balance, movement, order.

These didn’t figure in my college courses, so at first glance, they seem sort of esoteric. (Did I use that word right?!) I mean, what exactly do designers mean by unity? Balance? Rhythm? Do I need to go to the deep end of the design pool?

Planning in the works

Yes, I do.

In the weaving process, the hardest part for me sometimes is the designing. Why is that? Decision-making mostly, along with lack of confidence. I go back and forth about colors and placement, stripe sequences and where to put borders. It can take the better part of an afternoon to pull together a towel warp. If I can make these design principles a part of my planning, maybe the process will go more smoothly.

If I place a border on a towel using the Golden Ratio, I can trust that it will look good.

If I blend colors from one shade to another using a Fibonacci series — each number the sum of the two previous numbers (0, 1, 1, 2, 3, 5, 8, 13, and so on) – the transition will balance. In weaving, that could be the number of threads or the size of the stripe. Knowing how the system works should make designing less of a guessing game.

So now whenever I come across a design term that is a little vague to me, I will think of Mom and look it up. It will be worth it.

Prerequisites

Tags

,

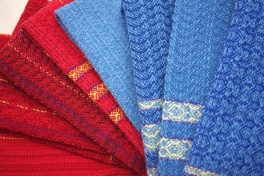
Blue and Red Towels off the loom

I’ve often done things the hard way, mostly because of impatience.

In high school, most students took Literature before they took Creative Writing. Except me. I insisted on taking Creative Writing first, then had to go back and take Literature the next year anyway. Would’ve done better in the proper order.

As a college freshman, I thought Prehistoric Archeology looking interesting, but Anthropology 101 was a prerequisite. When they removed the prerequisite, I jumped right to the course I thought I wanted without any real understanding of what prehistoric archeology was. There’s a reason for prerequisites.

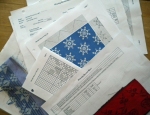
Prerequisites in weaving are necessary too. While it’s fun to jump right in and weave something wonderful, eventually you have to know how to design your own project and dress the loom by yourself. Understanding how the threads interact and how drafts work helps determine which weave will work best for your project.

I admire weavers who study a weave structure and know how it works. I mean really know how it works. Through examination and practice (the prerequisites), they build an instinct about the weave. They can look at a sample of that weave and know right off the bat how it was threaded, how it was treadled.

There’s a weaver in our study group who weaves M’s & O’s and ripsmatta. Paula knows M’s & O’s and ripsmatta. Mary Jane can look at a block weave and before too long figure out exactly how many blocks were used and how they were threaded. Jenny is delving into tapestry and has created some amazing little treasures as she adds to her already-expansive weaving skills.

I want to be like them when I grow up.

Opphämta on the Loom

There are so many weave structures that I skipped through in my weaving journey. One or two projects does not give a very firm foundation. On my way to twill and damask, I skimmed over brocade, lace, crackle, summer and winter, pile weaves, trying only a few token samples before moving on. So earlier this year, I decided that yes, I can go back and work on those weaving prerequisites. It’s never too late to make resolutions and review the wealth of ways threads intersect.

In between my usual projects this year, there’ll be lots of reading and lots of sampling. The goal is to expand skills that have become maybe a little too routine, a little too predictable. What better way to freshen perspective than to go back and catch those weaving prerequisites?

Weaver, Know Thyself

Tags

, ,

One of my former weaving teachers, Madelyn Van der Hoogt, used to say there are two kinds of weavers: color/texture weavers and structure/pattern weavers.

The color/texture people are drawn to – well, color and texture. Their projects bump and bubble with shades and hues, delighting the eyes with a virtual flower garden on the loom.

The structure/pattern weavers gravitate towards those intricate interlacements that take the yarn in elaborate diamonds and laces. How do you get the strict grid on the loom to softly curve in the design?

Like all generalizations, these show opposite ends of the weaving spectrum. Most of us fall somewhere in between the extremes, but may drift toward one end or the other. At one point in a guild meeting, we were discussing this and a friend told me “Oh you’re definitely structure/pattern!”

Hmmm. I hadn’t thought of myself as being so far to that end. But as I scrolled through my weaving pictures, it’s obvious. While I do dabble in color blending and like a bit of texture in my towels, those fancy diamonds and stars show up over and over again.

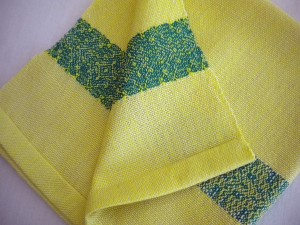
The lemon napkins with a green twill border.

Lemon and Jade Cotton Napkins

A similar pattern shows up in some red and blue towels.

Cotton and Linen Kitchen Towel in Royal and Natural

Red Cotton Towel woven "as drawn in."


There are the double weave placemats with repeating blocks and ovals.

Marsala and Cream Doubleweave Placemats

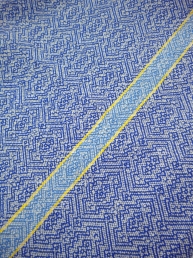
And then there are the small table cloths sporting diamonds, stars, and blocks overall.

Weaver, know thyself.

Right now I have a towel warp on the small loom and my mind wanders while I’m throwing the shuttle.  What can I put on the drawloom that will be more than an exercise in sampling? How can I adapt the elaborate fancy twills from the 18th century Snavely manuscript into something delightful for the 21st century? Is there room in our clear-the-clutter culture for decorative textiles?

So my mind wanders. I think a point twill on the 12-shaft loom is beginning to take shape.

“Plays Well With Others”

Tags

, , ,

dsc_1061a111At a recent guild meeting we watched a portion of Laura Bryant’s DVD “A Fiber Artist’s Guide to Color.” She discusses how to arrange colors so that they don’t “fight” against each other. That reminded me of elementary school report card behavior comments:

  • Follows directions
  • Completes assignments
  • Expresses ideas clearly
  • Does neat thorough work
  • Plays well with others

Do the colors I pick for any given project follow my mental directions in the warp and weft? Do they express my ideas of what that fabric should look like? Do they “play well with others”?

dsc_1055a111

Laura took the audience through several exercises demonstrating how our perception of colors is affected by all the other colors around them. Putting a purple patch over a white background or a blue background affects how that purple looks. Our eyes will “see” it as different when it is actually the same.

Watching her exercises, I recalled a “problem child” cone of yarn I have that doesn’t play well with others. It’s called “Bluebird” and by itself, is a delightful purple which leans toward blue. But just try to blend it with other purples or even with reds and it becomes either a bully by standing out like a neon light or is itself bullied into a non-descript gray.

I can blame some of this on my camera or my lighting, but this cone of yarn is often the culprit when I can’t get a towel to photograph well. It’s a case of the background color either highlighting the accent or pulling all the color out of it. What I need to figure out is the happy medium.

I do a lot of color-blending in my warp and it’s fun to see which cones work together and which ones I have to save for another project. That’s what makes each project unique, each towel “expressing ideas clearly” and “playing well with others.”

……..

Don’t forget the holiday specials going on in my Etsy shop. I am offering 10% off on any orders over $75. Just enter the code HOLIDAY18 at check-out. And if you order on today, November 26, your treasure will ship for free.